Category Archives: gifts & crafts

How To Make Infused Olive Oils

How To Make Infused Olive Oils

Don’t miss a thing… Be sure to follow us at  DIY Cozy Cottage on Facebook  to get updates for all of our new sweet n saavy projects – posting 3 to 10 new projects everyday!

infused oilsOh yes you can, and it’s so easy!  I love the charm of these kind of delicacies. So, not only is it possible to flavor your oils, it’s oh so delightful to cook with these oils whether you’re a gourmet chef or not.  It just amps up the flavor of your dishes effortlessly, and whats not to love about that!

Not only can they be used for cooking, you can use them to drizzle flavor over your pasta or your favorite artisan breads with some hummus or warm roasted garlic ~ yeah you get the idea!

Tip: for the best flavor use the highest quality olive oil you can ~  the food network’s test kitchen tried many brands and found that Bertolli and Pompian were the best oils on the market for the money, for taste and thickness etc.

You can also flavor your oils using  thyme, rosemary, sage, basil or oregano.  Just substitute the herbs.  Or, you can come up with your own creative blends of herbs, with chilis, peppers, lemons, garlic, and even smoke flavoring.

Using whole sprigs of dried fresh herbs is what gives the bottle of your infused oils it’s charm and rustic elegance.

Once you do up your oils, it takes about 3 weeks for the flavors to have taken to the oil, and the longer you let it sit, the flavor becomes more intense.

Be sure to follow the specific directions for creating these oils so you make them safely without introducing bacteria into your flavored oils.


If you love cooking or know someone who does these are must have’s for your kitchen!   Flavored oils or infused oils as they are sometimes called only take a few minutes to make, once you have everything ready.  If you need empty bottles you can order some online here, no need to buy the bottles in bulk, or you could even put them in empty wine bottles, just adding a new label, hope you enjoy learning How To Make Infused Olive Oils.

Just Putzin shares recipes for Lemon, Chili, Rosemary and Garlic infused oils
Enjoy making Flavored Oils

How To Make No Sew Placemats

How To Make No Sew Placemats

Don’t miss a thing… join us at  DIY Cozy Cottage on Facebook  to get updates for all of our new sweet n saavy projects – posting 3 to 10 new projects everyday!

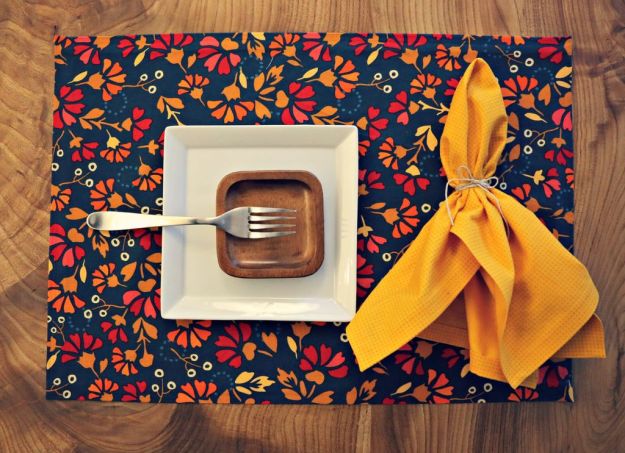
no sew placematsOkay…. you’re–a–gonna–love–me for this!  Sweet DIY for how to make placemats without pulling out the sewing machine!  I love using fusible bonding web whenever I can, I’ve used it for hemming pants, for creating appliques on jackets and jeans and on and on!   What I love the most about this project is that you can choose your own divine fabrics.  Just make sure that the fabrics that you choose are washable, you don’t want to have to dry clean your placemats and napkins ~ yikes, that’s ‘spensive Lucy!  This tutorial from Instructables also gives you the instructions to create the napkins with the no sew method.   And you know by now that I think that anything made by hand makes the sweetest gifts!

What you’ll need for this DIY No Sew Placemat project:

1.  Fabric – pre washed
2.  Scissors
3.  Fusible Bond
4.  Iron
5.  Measuring Tape or ruler

If you want to make the napkins as well, I suggest a color that is in the placemat fabric for the best overall look – like the one shown in the photo ~ and you know you wanna look good, especially if company’s coming!

You can whip out these no sew babies in a matter of minutes…   If you’re like me, you like to have special things like this for each and every holiday, Christmas, Thanksgiving, New Years, Valentines, St Patties, 4th of July… and then you also want special ones for birthdays, date nights.  Well, it’s just fun isn’t it, and we all wanna have as much fun as we can possibly fit into any day *wink*!

You’re a diva of magnificance, and it shows, oh yes it does darlings, put on your magic slippers and dance!

Check it out, then send me the photos of your finished masterpieces!

No Sew Placemats

Russian Tea Recipe

Russian Tea Recipe

Don’t miss a thing… join us at  DIY Cozy Cottage on Facebook  to get updates for all of our new sweet n saavy projects – posting 3 to 10 new projects everyday!

russian tea recipeFunny that I just stumbled upon this recipe for Russian Tea… I lost the recipe a few years ago, but instantly recognized it when I saw it on Daunes site.   I first had Russian Tea when it was given to me as a Christmas gift years ago ~ I was hooked,  and I do mean hooked! And from that point I made my own for years, at the beginning of fall each year.   It makes a lovely gift, and mine was given to me in a quaint little tin which I still have btw… now I keep my cornstarch in it!

Whip up a large batch and give it as a gift ~ they’ll love you, they’ll adore you… then they’ll ask for more!   Daune also shares a printable tag to go along with your gift, as shown in the photo!

Go get it already!

Russian Tea Recipe

How to Make Tea Cup Candles

How to Make Tea Cup Candles

Don’t miss a thing… join us at  DIY Cozy Cottage on Facebook  to get updates for all of our new sweet n saavy projects – posting 3 to 10 new projects everyday!

tea cup candles

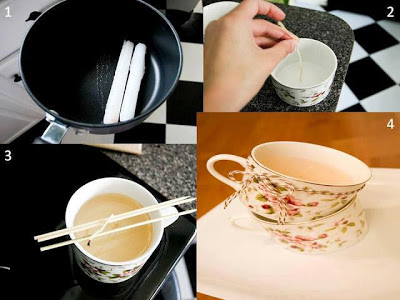
tea cup candlesThis is a super easy and yet such an elegantly charming project.  Please use a double boiler when melting your candles~ I’ve learned from experience that the wax can get way too hot if you put a pan with candles or wax directly on a burner.  The safe way to melt candles or wax is the slow way… low and slow baby, low and slow!

The great thing about this project is that you can use scented candles without adding the expense of scented oils. *sweet saver*

What you need for this project:

1. Tea cup(s)
2. Candles
3.  Candle wick
4.  Chop sticks

Now  jump in and get started…. Find the perfect tea cups and some candles scented or unscented… this is your baby, you get to choose, you can also use any color of candle you fancy.

Melt your candles using a double boiler

Prepare the teacup with a wick by tying the wick to a chopstick and laying it across the cup, making sure that the wick reaches the bottom of the cup and is centered.

Then when the candle has melted, slowly and carefully pour the melted candle wax into the cup

Let stand til candle hardens

Cut the wick down to size and there you have it… a tea cup candle!

What a delightfully charming spot of heaven.  They are sure to be a favorite, make lots!  This would also make a sweet thank you gift, bridesmaids gifts, etc – you get the idea!  If you find antique cups these make for real treasures.  Hope you enjoyed how to make tea cup candles.

photo  credit unknown

How To Make A Go Fish – Fishing Toy

How To Make A “Go Fish” Fishing Toy

DIY lovers, don’t miss a thing… join us at  DIY Cozy Cottage on Facebook  to get updates for all of our new sweet n saavy projects – posting 3 to 10 new projects everyday!

fish toyThis is so adorably cute, and your kids will love this.  Puts a new spin on “go fish”!
How much fun would you have making this for your kids?  Here’s the ridiculously easy instructions;

1.  Find old socks, or buy a few pair of new ones ~ must be cute ones!  Add a piece of metal in the mouth of the the fish  like a nut from the hardware store ( NO SHARP EDGES).   Stuff with fluff, add a button for an eye and tie with a ribbon as shown.

2.  Find a stick, tie a string to the stick with a magnet tied inside of a piece of thin cloth at the end of the string.

3. Go fish!

* This game is NOT for toddlers who put everything in the mouth*

How To Make Night Light Houses

How To Make Night Light Houses

DIY lovers, don’t miss a thing… join us at  DIY Cozy Cottage on Facebook  to get updates for all of our new sweet n saavy projects – posting 3 to 10 new projects everyday!

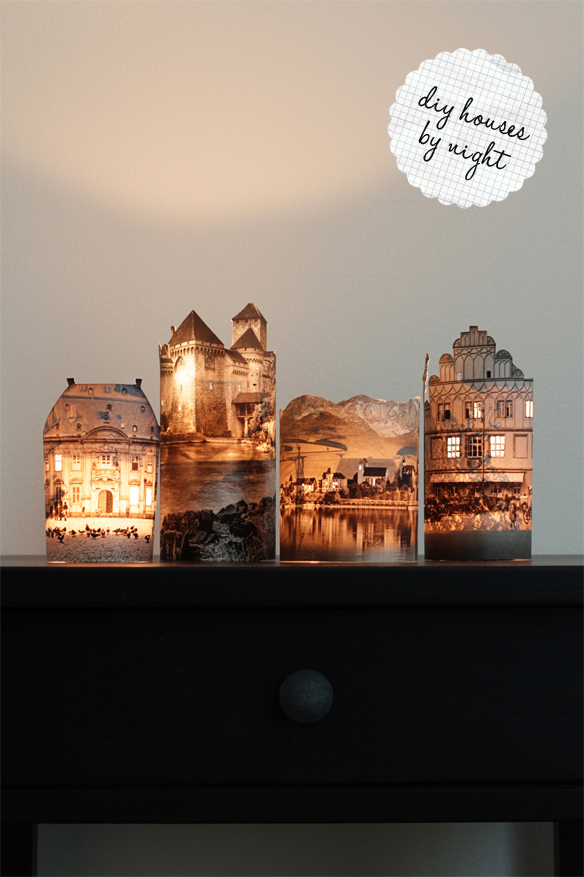
night light housesCan you just imagine making your own little enchanted wonderland of castles and cottages? How perfectly magical!  Begin this project by searching and collecting the images of castles and cottages you want, it’s a breeze from there to make this project with battery operated tea lights.

Claire shares her magic with us

How To Make Night Light Houses

How to make a Menu Board out of an old cutting board

How to make a Menu Board out of an old cutting board

Don’t miss a thing… join us at  DIY Cozy Cottage on Facebook  to get updates for all of our new sweet n saavy projects – posting 3 to 10 new projects everyday!

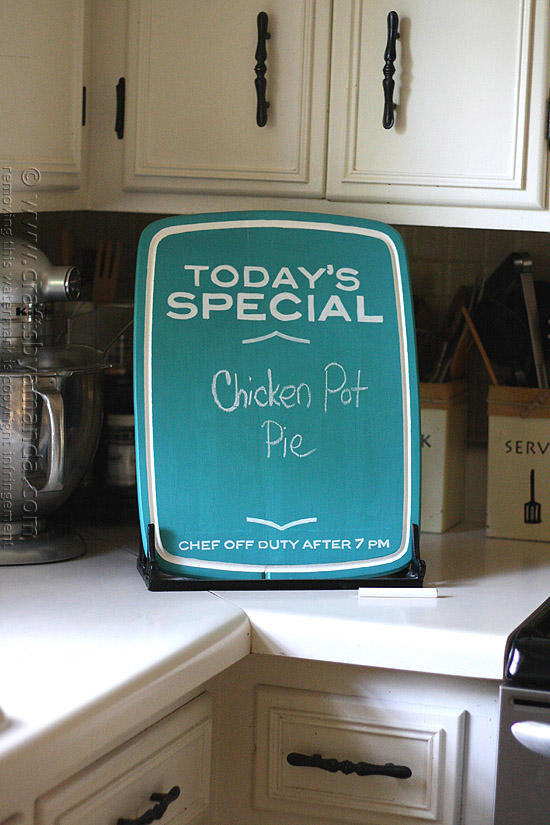
cutting-board-chalkboard-menu-1This is a very cool idea. Especially if your family is centered in the kitchen. For a family that cooks together, this is just a must! This a very classy way to let your family know what’s on the menu for the day, or what snacks are available. This is handy when the folks aren’t available, and the kids come home from school hungry and ready to eat. You can let them know what to look for in the fridge, or even how to warm it up and serve it. Nifty!

Clear here to learn how to make a

Menu Board from an old cutting board